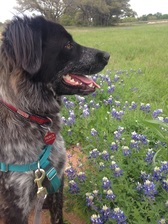
 Loose leash walking is one of the most challenging behaviors for most dogs to master. There are a lot of reasons why: For one thing, dogs generally like to walk at a faster pace than we do. They also have an opposition reflex, which means they instinctively push against pressure – in other words, when they feel the pressure of a tight leash, instead of backing off they pull harder into the pressure. It doesn’t help that the environment around us on walks tends to be overstimulating and more interesting than we are. One note: “Heel” and “loose leash walking” are not the same thing in most situations. Teaching a “heel” (where the dog stays in position right next to your side, focused on you the entire time and matching your pace) is wonderful and can help loose leash walking as well. However, it does take a lot of time and effort, and most dog parents want a more casual loose leash walk (meaning the leash stays slack and the dog is not pulling against it). So when I refer to leash walking through this post that is what I mean. In the first part of this blog post, we covered choosing the right equipment. This is vital to successfully getting your dog to walk nicely on the leash. But there are a few training plans you can follow to teach your dog that staying close to you and keeping a slack leash is a better option than dragging you down the street. Make Your Side a Magnet My mantra when teaching loose leash walking is “Make your side a magnet.” You want your dog to automatically return to your side on a consistent basis. You can make this happen by catching good behavior (walking next to your side) and making sure the treat happens in the spot you want your dog to walk. Where you feed the treat is vital here – if you give your dog his or her treat in front of you, that is where they will gravitate as you walk. If you deliver the treat right next to your leg, that becomes the spot they keep coming back to because that is where they have a reinforcement history. Don't Reward Pulling One of the biggest mistakes I see people making when walking their dogs is continuing to walk when their dog pulls. If your dog wants to walk, moving forward at all is rewarding – if you move when your dog pulls, you are rewarding pulling on the leash. Instead, stop and plant yourself when your dog pulls, and only move forward when there is no tension in the leash. This can take a lot of time and patience but, when combined with the other training techniques mentioned, the pay-off is worth it. For some dogs, changing direction or taking a few steps backward can also be helpful, but be careful that you are not pulling too hard on your dog’s leash as you do this – just turn and walk, don’t drag or yank. Teach Focus Many dogs pull simply because they want to explore the interesting things around them. You have to make focusing on you more rewarding than the rest of the world. Use high-value rewards at first (cut-up hot dogs, chicken or cheese usually work really well for this exercise) and start in a low-distraction environment to help your dog be successful. Reward your dog for any eye contact, whether they offer it on their own or you ask for it with a cue. Once they get the game, add in more distractions. I also like to give dogs a cue that allows them to go sniff or explore their environment when they are being good. For example: they sit and look at you, you tell them “go sniff” and allow them to explore for a few minutes before calling them back. (Make sure to reward coming back to you so they don’t just want to sniff all day!) My basic routine for starting loose leash walking is this: I stand still with the dog and wait until they focus on me, click or yes to mark good behavior and give them a treat next to my side. I repeat this a few times, then try to take just a few steps forward. If they stay close, I mark the good behavior, reward and repeat. Over time, the rewards are spaced out until they can be faded to low-value treats like kibble or given very infrequently. Teaching loose-leash walking is never a quick process. For most dogs, the “wrong” behavior here is so rewarding that it takes a lot of repetition and practice for the behavior that we want (walking nicely close to us) to become reinforcing enough to replace it.
3 Comments
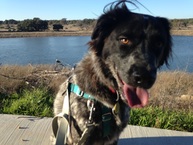 For many of us, it’s a daily ritual – we pull out our leash, clip it to an excited dog, and head out into the world to go for a walk. But for most dog owners, those daily walks are far from easy. Loose leash walking, simply, means that your dog is able to walk with you calmly on a loose leash. Sounds easy, but many dogs pull, drag behind, or wind around our legs as we try to move. In this first of two blog posts, I’ll cover what equipment can help make your walks a bit simpler; in part two, later this week, I’ll go over the training techniques that can make your walks easier and more pleasant for both you and your dog. Equipment is tricky. Every dog is different – some dogs are going to respond better to one tool, while others might find it aversive and prefer something different. Collars For most dogs, collars are more helpful for identification than walking. Even a standard flat collar can pull on a dog’s neck in a way that is painful or damaging. Very calm dogs may be fine walking on a collar; most dogs will do better at first with their leash attached to other equipment. If you do use a collar for walking your dog, a martingale collar is your best choice – these collars have a second smaller loop that tightens just enough to keep the collar from slipping over the dog’s head if they try to back out or escape, but will not tighten to the point of choking your dog any more than a standard collar. Over time, as your training progresses and your dog is walking nicely, you may decide to switch from a harness or halter to a collar for walks. This is a great goal, but can take a long time for many people, and other equipment such as harnesses are fantastic tools as you work with your dog. Don’t try to switch to the collar until you and your dog are ready as it will be harder to keep them under control if they haven’t had the right foundational training and they could potentially do damage to their trachea if they are pulling too much. If you are just using your dog’s collar to hold ID tags, a standard flat nylon collar is a fine choice. For dogs with fur that is prone to matting, a rolled leather collar may be a better option. I do NOT recommend choke, prong or shock collars for a number of reasons. These used to be used more widely in training, but are being phased out more and more as training practices evolve. Aside from the potential physical damage of these collars, there are a variety of other options available now that are more effective and have less potential side effects. Harnesses There are a huge number of harnesses on the market, and some definitely work better than others. Standard harnesses are good for taking pressure off of your dog’s throat, but do not generally help with pulling. Some dogs may pull less on them, but many dogs will pull harder with them on. I recommend them primarily for small dogs who are more prone to collapsing tracheas so the pressure is taken off of their throat. Front-clip harnesses are a fantastic option for dogs who like to pull on the leash. The leash clip for these harnesses is on the front of the dog’s chest instead of their back, which gives you significantly more leverage when walking your dog. If they begin to pull, the pressure is on the front of their chest instead of spread along their body or on their neck, and they are turned sideways instead of being able to forge forward. There are also harnesses that tighten slightly under your dogs front legs when they pull. Some dogs seem to respond to these, but generally my experience has been that they are not as effective for most dogs as the front-clip harnesses. If you do try one of these, look for one with padding so it does not irritate the area under your dog’s front legs. My two personal favorite harnesses are the Easy Walk Harness, which is a fairly standard and simple front-clip harness, and the Freedom Harness, which has leash clips on the front and the back and comes with a leash that can attach to both, giving you more control and more options. (Having those two pressure points can be less stressful for some dogs as well.) But there are many great options available now for harnesses that can safely direct your dog and make your walk simpler. Head Halters Head halters tend to be a little more controversial than harnesses – they look a little like muzzles, some dogs hate the feeling of having something on their face, and if used incorrectly they have more potential for physical harm. However, I have seen dogs who are completely transformed and even calmed by head halters, and if used correctly they can be a great tool. Generally, head halters fit around the dog’s muzzle and behind their ears, and the leash clips under their chin. There are some variations on this design but that is the most common option for this tool. It works somewhat like a halter on a horse – with their head under your control, it is much harder for your dog to pull, and you are much more easily able to guide them. The most important thing to remember if you decide to try a head halter is never to jerk it or allow your dog to jerk hard on it as it is attached to their head and they could potentially damage their neck with a sharp pull. You also want to take the time to properly acclimate and desensitize your dog to the head halter so it is a pleasant experience and not an aversive one. It is much more pleasant to walk a dog who is calmly walking with you than a dog who is pawing at his face every few steps trying to take his equipment off. Head halters are not for every dog. They tend to suppress behavior, so they can sometimes mask issues, and some dogs find them scary or aversive. Used correctly, they should never be painful or uncomfortable, so be careful to make sure your dog is okay with the halter before using it. Personally, I generally start with a harness and only go to the head halter when that is not enough. While they can be fabulous in some scenarios, generally the harness is more comfortable for the dog and simpler to use. Leashes For most dogs, a standard 4 to 6 foot leash is by far the best option for going for a walk. Retractable or flexi leashes can be great on your own property or in very controlled situations, but are dangerous in public and have the potential to cause injury to you if your dog gets overexcited and wraps the leash around you. I’ve seen some nasty scars caused by retractable leashes and only recommend them with the proper training in place and in the right situation. Later this week, look for part 2 of this post, which will cover teaching your dog to walk calmly by your side on any equipment.  “Set your dog up for success!” This is my training mantra. I say it in almost every training session at least once, if not many times. It is such a vital element to good dog training that there really isn’t any way for me to stress it enough. But how does “setting your dog up for success” actually play out in real life?
This one is a biggie. If your dog doesn’t have access to the trash while you’re out of the house, they can’t tear it up and decorate your living room with it. Management means that you are creating an environment that allows your dog to make the right decisions instead of the wrong ones. Don’t let them have access to things you don’t want them getting into, don’t put them in situations where you know they’ll mess up, don’t force them into environments where they will be stressed out or scared. And don’t give them a chance to practice (and get reinforced by) unwanted behaviors! 2. Supervision Dogs don’t do something wrong and then sit around feeling guilty about it, waiting for you to get mad. They pee on the carpet and move on, completely onto the next thing as soon as they’ve walked away. So if you have a dog who isn’t housetrained, for example, giving them complete freedom of the house is just asking for them to have an accident. But if you are watching them closely, you can see the signals that they might need to go outside and have a chance to prevent them from making that mistake. Once your dog is reliable, you can gradually give them more freedom and reduce supervision, but keeping a close eye on your dog can prevent a number of problems and create a much more pleasant housemate. 3. Meet Your Dog’s Needs All dogs need food, exercise (mental and physical) and attention. If you dog is grabbing your remote and waiting for you to get mad and chase them around the room, they’re probably bored and finding ways for you to interact. If they are jumping all over you, mouthing, or barking to get your attention, again, there is probably something missing. Most dogs need at least an hour of good exercise a day (and no, this does not mean running around the yard by themselves). And dogs are social creatures, so they do not do well being isolated all the time – positive attention is vital to their happiness. Play with your dog. Teach them some tricks. Give them some awesome petting while you’re bingeing Netflix. Take them for a walk somewhere new. There are a ton of creative, fun ways to meet your dog’s needs and keep them happier and more successful. 4. Reinforce Good Behavior One of the biggest differences I see between good dog trainers and the average dog owner is that many dog owners focus on what they DON’T want their dogs to do instead of what they DO want their dogs to do. Most undesirable behaviors can be replaced by an incompatible behavior that we like just by making that good behavior way more reinforcing. You don’t want your dog to jump on people coming in the door? Teach them that sitting when people come in the door gets them instant attention and a whole bunch of treats. Don’t like your dog begging at the table? Teach them to lie on a dog bed in the corner and give them a Kong stuffed with peanut butter to lick while you’re eating, or toss them treats through the meal for staying on their “place.” 5. Work WITH Your Dog Instead of Against Them Just like people, dogs have many individual differences. They have their own quirks, based on genetics, experience and many other factors. If you have a dog who loves to sniff trees, don’t get upset when they won’t listen on walk – turn it to your advantage by using the opportunity to go sniff a tree as a reward for good behavior. Take advantage of your dog’s individual quirks and make them a power for good instead of training frustration. 6. Don’t Forget: Your Dog is a Dog All of us humanize our dogs at one point or another. It’s perfectly natural – they’re part of the family for most of us. But it can be dangerous and unfair to your dog to think of them as a person when you put unrealistic expectations on them. There is a lot of debate in the animal behavior community on what emotions dogs share with us, but the general consensus is that cognitively they are about on the level of a toddler. So no, your dog is not sitting around plotting revenge and that’s why they peed on your bed when you left them all day. It’s a lot more likely they were anxious that you were gone, or they just couldn’t hold it and that seemed like a nice soft spot. 7. Patience, Patience, Patience Again: Your dog is at about the cognitive level of a toddler. If you were trying to teach a small child math, would you get angry and yell every time they messed up? Or would you try to explain it again in a way that was more understandable to them? You and your dog are speaking different languages, and some things are going to get lost in translation. Take your time and move at a training pace where both you and your dog can be comfortable and find success.
 As I study for a certification test this weekend, I’ve been reading and re-reading a lot of dog behavior books. It’s all stuff I know – most of them are books I read when I was starting as a trainer many years ago – but every time I read them I find little nuggets of genius that help make me a better trainer. Most of the time, I don’t use the technical jargon from those books with clients. It’s important they have an understanding of what we’re doing with their dog, but it’s not really vital that they know the exact scientific term for each method we’re using. However, there are a few basic ways of approaching learning with dogs that can be helpful to anyone wanting to understand a bit more about how their dog’s brain works. The behavioral science that we use with dogs will probably be familiar to anyone who has studied psychology or learning theory. It doesn’t matter what species you’re dealing with – behavioral theory stays the same. For our purposes, two methods of learning are most important: classical conditioning and operant conditioning. Classical conditioning is pretty straightforward: you are making an association between two things. Pavlov’s dogs are the perfect example of this. His research involved dogs learning that a bell meant food was coming, and the dogs eventually began to salivate as soon as they heard the bell because they knew what would follow the sound. In training, an example of classical conditioning is when we pair a clicker with food so that when the dog hears the click he knows food will soon follow and makes a positive association with the behavior that happened with the click. What we use much more to teach behaviors, however, is operant conditioning. In simple terms, operant conditioning means that your dog learns that their actions have consequences. In other words, their behavior influences what happens next. There are four types of operant conditioning: positive reinforcement, negative reinforcement, positive punishment and negative punishment. Positive and negative do NOT mean good and bad here – they are used to talk about adding something or subtracting something. Reinforcement means the behavior the dog performed will increase in frequency; punishment means the behavior will decrease. This is confusing for a lot of people, especially since “punishment” usually implies something bad in our minds and so does “negative,” while “positive” is generally associated with good things. This is why most trainers don’t use these exact terms with our students – most people are familiar with positive reinforcement, but the meaning of the others tends to get muddled unless you’ve spent some time studying their meaning. Most modern trainers stick to positive reinforcement and negative punishment, for a number of reasons, but mainly because they tend to be the most effective, the most humane, are the easiest for people to use correctly and have the least number of potential side effects. With that in mind, here are examples of each type: Positive reinforcement: The dog does something you want them to do again, so you give them something they want. Example: The dog sits when you ask him to, so you give him a treat. Negative punishment: The dog does something you want them to stop doing, so you take something away that they want. Example: The dog barks at you for attention, so you remove your attention by walking out of the room. The other two types of operant conditioning are no longer used by most knowledgeable trainers unless other possibilities have been eliminated, and even then should be implemented by someone who knows what they are doing, as they have the most potential to be done incorrectly and cause more harm than good. For that reason, it is extremely rare that I will even consider minor versions of these and I am NOT recommending the examples used: Positive punishment: The dog does something you want them to stop doing, so you add something they do not like to the situation. Example: The dog pees in the house and you yell at them. Negative reinforcement: The dog does something you want them to repeat, so you take away something they don’t like. Example: The dog stops barking at a scary dog so the scary dog is moved out of sight. The average dog owner does not need to remember these exact terms, but knowing the idea behind them is helpful to understanding how your dog learns. If you have more interest in learning about some of these concepts, or other ways of viewing how our dogs think, I highly recommend these books, which are all considered staples in the dog training community, and can benefit anyone who lives their lives with dogs: Don’t Shoot the Dog by Karen Pryor The Culture Clash by Jean Donaldson The Other End of the Leash by Patricia McConnell 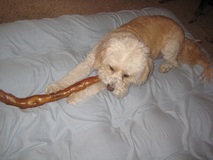 Your dog is tensed on his bed, a bone pressed between his front paws. As you move closer, he stiffens, and you hear a low growl. You reach for the bone, and he snaps. This is a clear-cut example of resource guarding. This is a totally natural behavior in the animal world – a stray dog, for example, may have to guard the scraps of food they find to be able to eat. In theory, pet dogs should have moved past the need to guard the things they see as resources – after all, they have everything they need in our homes, right? But in reality, many dogs still display this behavior, sometimes in a way that can be dangerous for the people and animals interacting with them. Dogs view a lot of things as resources – food, toys, their dog bed, sometimes even their people. Food and chews like bones are the most common source of resource guarding, so I will use that as an example throughout this post, but many things can be subject to guarding by your dog. So what do you do when your dog is resource guarding? Step one is prevent the situation from escalating. If your dog has a bone, and starts to guard it, do NOT take try to take the bone. Many dog owners think that allowing the dog to keep the bone is reinforcing their bad behavior, but actually, your dog generally is guarding because they feel insecure about the resource, so taking it away will just make the behavior more intense in the future as you will now be viewed as even more of a threat to their resources. Trying to take the bone also significantly increases your chances of a bite happening. There are no “winners” when dealing with aggressive behavior – safety is far more important than showing your dog who’s boss. Remember: your dog is not guarding their bone because they are being dominant or to defy you. Most of the time, they are reacting instinctively to the worry that you going to take their resource away, and are trying to prevent that from happening. There are a few resource guarding protocols online or in publication (“Mine!” by Jean Donaldson is a great reading option for people with resource guarders). The basic idea of many of them is the same: you want to create a good association with you approaching when your dog has the resource they are trying to protect. You will need to set up a safe scenario here first. So let’s say your dog guards his food bowl at breakfast. When he has his breakfast, approach only to the point where he knows you are there, but is not yet reacting – you want to stay at a safe distance and keep your dog under threshold. Once you get to the right spot, toss a super-tasty treat (I like to use something really high-value like hot dog or chicken) into his bowl or as close as you can get and walk away. Repeat this step until your dog is totally comfortable with you approaching at that distance. If he seems happy and relaxed with your approach, start gradually moving closer and closer. In most cases, you should eventually be able to touch or move the bowl without the dog reacting negatively. This works because every step of the process heavily pairs your approach with really good stuff, so you getting closer becomes something awesome instead of something scary. This is a very simplified version of dealing with a complicated issue. If you have a dog who guards his resources in a way that is dangerous (lunging, snapping, etc.), enlist the help of a behavior professional to make sure your training plan is set up in the correct way. The goal is to always keep the process safe and effective, so that your dog goes from growling when you approach their bone to wagging their tail in excitement. 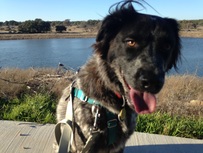 Click! It’s a wonderful sound. For my dog, it means he’s done something awesome and he’s about to get a reward. For me, it means our training session is going well. The clicker is supposed to be a reinforcer for my dog, but it’s become a reinforcer for his trainer, too. I get a lot of pushback when suggesting the clicker to dog owners who have never used it before. It’s too complicated, they tell me. I can’t juggle so many things in my hand. I’ll never get the timing right. Here’s the thing: the clicker isn’t complicated. In fact, it’s pretty straightforward. Your dog does something good - click, treat. As humans, we tend to overthink things, and sometimes that can make something like clicker training seem intimidating to a person unfamiliar with it. For our dogs, however, the clicker makes training faster and more successful because we are communicating in a way that our dogs find clear and easy to understand. The idea of a clicker is to provide a marker that lets your dog know the exact second they do something correctly. This is paired with a reward like a treat so that they know the marker is a good thing and means something positive is going to happen to reward their good behavior. Because dogs live so much in the moment, if our reward comes even a little too late our dogs can easily associate it with the wrong thing – for example, if they sit, we go to offer the treat and they jump on us right as we are offering it, in their mind the treat is more likely for the jumping than the sit we were actually trying to reinforce. So why a clicker? You can also use a word – I use “yes” – and that is effective, too, just not quite as fast. I like to have both as an option – the “yes” is easier to use when I don’t have a clicker handy, but the clicker tends to be faster for teaching new behaviors and especially for shaping more complicated behaviors. Studies have shown that dogs learn faster with a clicker than a verbal marker like “yes” (although the verbal marker is still faster than no marker at all). The second issue I encounter with new clicker trainers a lot is juggling all of the dog’s equipment, treats and the clicker. This does take a little practice and some handling skills. Generally, I have the clicker attached to a keychain or bungee I can put around my wrist so I don’t have to constantly hold it. I also wrap the leash around my wrist (or in some cases attach it to my waist) for security. Frequently I have the clicker in the same hand as my leash, so this is important. And I always have a treat bag or some other handy spot to hold treats so they don’t need to be in my hand. Play with this to figure out what feels most comfortable to you while training – this is just what works for me. And that brings me to another beautiful thing about clicker training – you don’t have to have the treats ready. Once you have “loaded” the clicker (paired it with good stuff by clicking and immediately offering treats several times) and your dog understands it as a positive marker, as long as the clicker happens at the right time (when the behavior you like happens), you don’t have to immediately have the treat ready. The clicker creates a buffer because your dog already knows what they did right, and as long as you click and then go for the treat, you will still be rewarding them in a timely manner and they will know WHY the treat is happening. This also helps a lot with not having the dog rely on the treat, as you don’t need to have it obvious or visible when training (eliminating the need to fade out having a treat in your hand, which takes extra time and can be tricky). The last “tricky” element about clicker training is timing. Timing is important here – the click needs to happen when the behavior you like happens. However, this is pretty easy to practice, and easier to get right over time with the clicker than with your voice alone. When I was starting out, I practiced my timing by bouncing a ball and clicking every time it hit the floor, or clicking when I was watching TV every time the commercial changed. It was fun and good practice. And the wonderful thing about this method is even if your timing is a little off, there really is no harm done – you move on and try again and as long as you don’t make a habit of clicking the same wrong thing every time your dog will be able to eventually figure out what you are actually looking for through repetition. If you have a very fearful or sound sensitive dog who seems nervous of the clicker sound, start with something much softer, like the click of a pen or a clicker wrapped in a handkerchief in your pocket. Once they are comfortable with that level of sound and are making a really good association, you can gradually try making it louder. Just keep in mind that if it gets too scary, you’re moving too fast. For nervous dogs, the clicker can actually be a great confidence-building tool once they understand the sound means really good things. The clicker is a fantastic tool with a lot of uses. If you’re new to this type of training, break it down and take your time – once you get the hang of it, you’ll find that clicker training is well worth the effort.  Next to loose leash walking, teaching a dog to come every time you call seems to be the hardest skill for dog parents to master. It’s a challenge even for professional trainers – convincing your dog that it is better to come to you than go sniff that tree or chase that squirrel is no easy task. I have four simple rules that I follow when teaching this cue that, with the proper practice, can result in a rock-solid recall. Rule #1: Choose a cue word that has no prior history, that you don’t say often, and that you will remember easily. If your dog has already learned to ignore your recall cue, or has a negative association with the word because you have accidentally poisoned it (see rule #4 for details on poisoned cues), starting fresh with a new word will make your job way easier. You also want to make sure your cue word is exciting every time, so don’t choose a word you say frequently. I like “here” because I say it less often than “come” and it’s easier to say in a cheerful tone versus a frustrated or angry tone. I have had students use different languages (“Aqui!”) or a completely random word (“Donut!”). The simple fact is, your dog has no idea what a word means if they have already created an association with it, so you can use any word at all. Just keep it simple (ideally one or two syllables) and use a word you won’t forget in the heat of the moment when your dog is running toward a busy street. Rule #2: Reinforce your recall cue every time, and use the best rewards ever. Your recall cue needs to be more exciting than everything your dog needs to ignore to come back to you. This is part of why recalls are so hard – we usually need them the most when there are distractions happening, and we usually need them when our dog is off-leash, two factors that up the difficulty factor on any cue immediately. So right from the start, you want to pair your cue with whatever gets your dog the most excited – I usually use cheese, hot dogs, chicken, etc. If your dog is more toy driven, that can also be a great option for this one, but try to use a toy they only get when practicing this cue and not just a boring one they get every day. This is a cue that could save your dog’s life, so it is not a good time to get stingy with the rewards! Rule #3: Until you have a strong cue, only practice in situations where you can easily get your dog back to you. I generally start the recall cue on-leash, with the dog very close to me. Make it as easy as possible – set your dog up for success! Once they get the idea, give them more distance – you can put them on a long line (my favorite choice), or even practice in a hallway going between two people. But if you try this in a large area off-leash too soon, your dog can easily ignore you, and they will quickly realize they don’t have to listen and the cue isn’t that important. Also keep in mind that chasing is really fun for most dogs, so if your dog does get away and you chase after them, you are rewarding running away. (I use this to help the cue by running away from my dog to make coming back to me fun and incorporating chase to my advantage!) If your dog is on a leash or long line and is not responding to the cue, it is okay to gently guide them back toward you, but NEVER yank or drag them. You want this to have only good associations! Rule #4: Only good things happen with your recall cue – nothing bad ever happens when they come to you! The recall is one of the most commonly “poisoned” cues. This means that we accidentally create a negative association with it instead of a positive one. This happens every time we call the dog and something happens they don’t like – they get in trouble for running away, or they have to leave the dog park, or they have to come in from the yard. These are punishments in your dog’s mind, so you are basically punishing them for doing what you want, which is going to make them much less likely to come back when it matters. If you call your dog and they get in trouble, why would they ever want to come to you again when they can run away and avoid the trouble? If you call your dog to come in from the yard or to leave the dog park and fun immediately ends, why wouldn’t they just ignore you and keep playing? To fix this issue, if you do need to call them for something like leaving the dog park, make sure you call them a few minutes before you actually have to leave so you can spend some time playing or petting before you go and they are not making an immediate association with leaving. It also helps to do random recalls throughout their time at the park where they are allowed to go back to playing so they don’t think the cue only happens close to leaving time. If you follow these rules and work at your dog’s pace, you will have a solid foundation for getting your dog to come back consistently on cue. A solid recall is not rocket science – just patience, time and some good training. 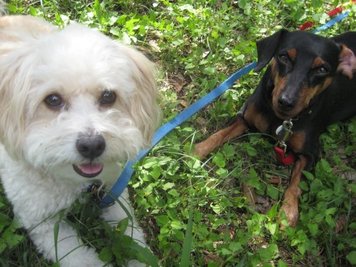 As a dog trainer, these words set my teeth on edge. “Don’t worry, he’s friendly!” This is usually being shouted by a clueless dog owner whose off-leash dog is barreling toward me and the dog I’m walking or training (on leash, of course, since in this scenario we’re in an area where leashes are legally required). If I happen to be holding a reactive or fearful dog, this is a disaster waiting to happen. Even if I’m holding a dog who is generally friendly, this situation has the potential to sour quickly, possibly creating lifelong behavior problems for the poor leashed dog who is about to get pummeled. The dog who is coming toward me might be friendly. Often, they are. But the leashed dog is trapped, and has no choice to greet or move away. The off-leash dog can do whatever they want, “friendly” or not. This is not an even playing ground, and even normally friendly dogs can react in a defensive way, thanks to the instinct for fight or flight in situations they perceive as threatening. So how can you set up for successful dog-dog greetings? Rule #1: If you are in an area where dogs are legally supposed to be on leash, have your dog on leash. Every time. Even if your dog is friendly, well-behaved and has a good recall, it is not fair to the other dogs in the environment who are respecting the rules. They are automatically going to feel more threatened by an off-leash dog, even if you are able to call your dog away before they reach the leashed dog. And I regularly see dogs who are “well-trained” unable to resist the lure of greeting another dog when I’m out in these environments. If you want to let your dog run off-leash, choose an area where dogs are allowed off-leash. Rule #2: Always ask before you let your dog approach another dog. Even if the dog looks calm and friendly, some dogs are okay until another dog gets in their face, some dogs show their discomfort in very subtle ways, and some dogs just don’t want to greet your dog. It is also possible that the other dog could be in training to be a working dog, and you could seriously damage their training by letting your dog race up and distract them. (As a service dog trainer – this happens all the time and can be a big setback to our training.) Rule #3: Teach your dog how to do a polite greeting. This means having them "ask for permission" first to avoid racing up to every dog they see, and it means keeping the actual greeting short and sweet. To have your dog ask permission, I like to have them do a "sit" and "watch me" (at a distance until it becomes a more automatic response), and when I tell them “free” they are allowed to greet the dog. Ideally, walk your dog parallel to the other dog so they are sniffing sides and butts instead of greeting face to face (which is much more intimidating). Count to three, tell your dog “Let’s go!” in a cheerful voice, and walk away. Short greetings are important because the longer the dogs linger, the more likely they are to decide to either play (not ideal on leash) or fight (never okay). If you keep the greeting short and pleasant, you will have a much more successful, friendly dog. And dogs who are uncertain will be able to move away before they decide things aren’t cool and react in a negative way. Reinforce your dog for walking away from the other dog with excited praise, petting, movement, treats or toys to help encourage them to be willing to leave the dog quickly. Obviously we have less control over how our dogs greet off-leash. I recommend having a really strong recall trained before going to any off-leash areas. I also never recommend taking a dog to an off-leash area if they are not comfortable interacting with other dogs. Watch your dog’s body language during any greetings and encourage them to move away after the initial greeting if you are uncertain both dogs want to play - usually you can do this by moving away yourself, calling them as you go. If the dogs do want to play, ask your dog to take breaks by calling them away and reinforcing them when they come back to you, then allowing them to go play again if they are being good. This helps keep the play calm and appropriate. And what if you do find yourself in the first situation, holding an on-leash dog while an off-leash dog races toward you? If you have time, get the heck out of there. Tell the other owner to call their dog, loudly and repeatedly if necessary. If they don’t get the hint, or if the dog is too close, my favorite method of keeping the other dog at a distance is to toss a handful of treats, distracting them with goodies on the ground while I make my getaway. If your dog is reactive, aggressive or afraid when faced with other dogs, get the help of a qualified trainer to set up safe, successful walks. Appropriate dog/dog interactions can be a lot of fun, but for the sake of your dog and other dogs in your community, don’t be the person shouting, “Don’t worry, he’s friendly!” Instead, be the person asking, “Can my dog to say hello?” Happy training! 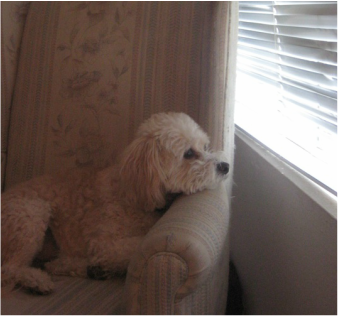 For many people, it’s a familiar scene: You’re sitting on the couch, unwinding after a long day, when someone knocks on the door. Suddenly, your home is echoing with alarmed barking, a streak of dog racing toward the now threatening entrance to your home, determined to let your guests know this house is protected. This scenario is one of the most common complaints dog trainers hear: my dog barks at the door when people come over. So why do dogs bark at the door and what can you do to teach your dog a better response? Dogs bark for a lot of reasons: fear, to alert you, to demand something, for attention, out of boredom, because they just enjoy it, to make themselves seem big and scary, to communicate with another dog… I could probably fill a page with potential reasons your dog is barking. So while it’s nice to know the reason (and in some cases it is fairly obvious or can be guessed), most of the time you can train your dog to stop whether or not you know why it’s happening. For almost all unwanted behaviors, the most effective way to train your dog to stop is to replace the unwanted behavior with a behavior you do like. My favorite alternative to barking at the door is a “place” cue. Place teaches your dog to go to a particular spot (generally somewhere comfortable like a bed or mat works best) and stay there until you tell them it is okay to leave that spot. To teach your dog to go to a place instead of barking at the door, your eventual goal will be that the cue to do "place" is someone knocking or ringing your doorbell. So the finished behavior will go something like this: someone knocks, your dog goes and lays on their place, you let in the visitor and then tell your dog a release word (I like “free”) that means you can now come off the bed and greet the visitor. Note: If your dog is fearful of visitors, this scenario may play out a little differently. In that situation, you are probably better off having them go somewhere out of sight when guests arrive (such as their crate or a separate room) and then bringing them out once everyone is settled on leash to work on some counter-conditioning (see my earlier post on fear for a few details about that). But if your dog is comfortable enough around strangers that they can greet them nicely once they have calmed down, the place cue can be a great option. If you have never trained or seen a "place" cue before, this video by Kikopup demonstrates one way to train it. (And if you are not following Kikopup on YouTube, I highly recommend her channel for great dog training videos!) Generally, I start a place by standing near the dog’s bed and breaking down the behavior into baby steps – the dog moves toward the bed, or puts one foot on, I mark the behavior as good (with a click or a “yes”) and reward. I always reward on the bed when beginning this cue so they start to associate the bed with good things. Once they understand going on the bed, I add in the cue (I use “place” – some people, like in the Kikopup video, use a cue such as “go to your bed”). Then I start to build a “stay” while they are on the bed and add in the release cue, “free,” so they learn that is when they are allowed to leave the bed. For working this with the door, I will eventually enlist the help of another person to beginning adding in a door knock or doorbell ring. The first time, I will have them knock softly or ring the doorbell once. As soon as that sound happens, I’ll cue “place” and heavily reward the dog for doing the place cue instead of running to the door barking. You want going to their place to be more exciting than the door, so you need to use a lot of high-value reinforcement in the beginning. The first few times, they may still want to go to the door, and it is okay to talk in an excited voice, move around in a fun way or use a few extra treats as you are first teaching this to get them really into doing the place instead. If this is still too hard, start with just one soft knock, even if it is you knocking on the wall where they can see it. Like any behavior, if you have trouble teaching this on your own, or it is not working for your dog, it’s a good idea to enlist the help of a qualified trainer. But if you train this behavior correctly, it can be a fantastic tool that gives you a much calmer dog when guests come over and less stress for you when someone is at the door. 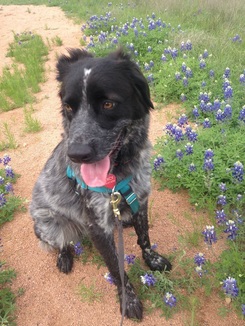 I live with a dog who is a bundle of nerves. Someone walks by the door? THREAT. A dog is walking off leash at the park? THREAT. That squirrel looked at me funny? THREAT. Percy sounds scary when he barks at these “threats.” He vocalizes at the top of his lungs, throws himself around, and tries to make himself as big and intimidating as possible. Why? Because he’s scared. Dogs express fear in a number of ways. Some cower, or try to hide. Some try to escape and become defensive if that doesn’t work (flight or fight!). Some bark or lunge to try to make themselves seem more threatening to scare off what they perceive as frightening. Some growl or even bite, sometimes with serious force. Some just shut down completely. In their minds, these responses are all perfectly reasonable. The dog barking at everyone at the park may seem aggressive, but in his mind he is just trying to keep all the scary things at a distance. The dog who growled at you when you reached your hand out to pet him was trying to warn you that he was uncomfortable and needed space. If we think about our own phobias, it makes sense. People who are very afraid of spiders might run away screaming, or they might smash that spider over and over again until they are damn well sure it’s dead. Just like in humans, dogs can develop fear in a number of ways. Sometimes there is a very clear explanation – they were attacked by a dog on a walk, so dogs on walks become scary. Sometimes they had a seemingly small experience during an important period in their development, like the incredibly vital puppy socialization period during the first few months of their life. And like with some people, some fears don’t have a logical or obvious cause. So how do we address fear in dogs? Because it is an emotion, and not a behavior, we generally go to classical conditioning, which means we are trying to change an association instead of teach an action. Many trainers use counter-conditioning and desensitization to help a dog work through a fear. Counter-conditioning is when you pair a previously scary or “bad” thing with a lot of really, really good things to try to change the emotion paired with it. Desensitization is slow exposure to that same scary thing, first at a comfortable distance and then gradually closer as they become more okay with it. One very important thing to remember here: we do not want to move the dog past his or her threshold too soon. The threshold is the point at which they become too uncomfortable to avoid reacting. They should be aware that the thing they are afraid of is present, but feel reasonably safe. Once they are over threshold, they have locked into the emotional part of their brain, the thinking part is gone, and you are probably doing more harm than good. If that happens, get them away and give them a break. Another important element of fear and stress is the physical effect it has on your dog’s body. They release cortisol when they have a bad or anxiety-inducing experience, and that can stay in their system for a few days. So multiple scary experiences happening in those few days can cause what’s known as trigger stacking, where they start reacting more and to things that seem less scary or important to us. So a basic set-up for working with a dog who is afraid: if you have a dog who is afraid of other dogs, set your dog up in an area where they can be a large distance from other dogs and can escape quickly if needed. Have a large number of very high-value treats ready (chicken, hot dogs and cheese are great options for this). As soon as the scary dog appears, treats happen. The dog is gone, they stop. The dog appears, treats happen. And so on. (A note: If you dog stops taking food, and it is food that they love, they are probably over threshold. Put yourself at a further distance and try again, or give your dog a break.) This of course works best if the other dog is fairly calm and being handled by someone who knows what is going on, so they don’t put too much pressure on your dog and push them over threshold. It is ideal to try to find a way to set up your dog for success and to limit their exposure to situations where they will feel trapped and terrified, which can make the fear worse. This example can be translated to any fears – if your dog is scared of thunder, for example, play a recording of thunder at a very low volume paired with lots of yummy treats, and gradually increase the volume as they become more comfortable. The dog I mentioned at the start of this post, Percy, has made a lot of progress using these methods. But he’s a pretty extreme case, and still has a long way to go. Sometimes working with dogs who are afraid can take a lot of patience and time. But the payoff for helping a fearful dog become more confident and helping them realize the things they found scary aren’t actually so bad is tremendous. A final note: I highly recommend finding a qualified trainer to help you work through these exercises. I also recommend this fantastic Sophia Yin handout, available to download as a PDF at that link, which shows common body language signals that your dog is anxious or fearful (which are overlooked by many dog owners). Good luck and happy training! |
Sarah Bond
Sarah is a Certified Dog Behavior Consultant and Certified Professional Dog Trainer - Knowledge and Skills Assessed. She lives in the Texas Hill Country near Austin with her two dogs, Percy, a cattle dog mix, and Clara, a lab/German Shepherd. Archives
October 2020
Categories |
 RSS Feed